As the first step in your outreach journey with Snov.io, you'll prepare and optimize your sending domains and email accounts for successful campaigns.
Step 1: Purchase domains and create mailboxes -->
Step 2: Set up domain's DNS records -->
Step 3: Connect email accounts to Snov.io -->
Step 4: Check domain health -->
Step 5: Add custom tracking domain -->
Correct setup of sending accounts is crucial. Skipping it may lead to deliverability challenges and undermine results of otherwise perfect campaigns.
Besides teaching you the steps, we'll explain the "why" behind each aspect so you understand their importance.
The pre-production phase, including the initial warm-up period, typically takes 3-4 weeks.
Before we start, log in to your Snov.io account → We’ll be doing an essential part of the setup there.
Outreach setup cost:
Let's break down the cost of setting up outreach with 3-5 domains and 10-20 email accounts.
- For sender domains/emails:
Domains x5 = ~ $110 (GoDaddy Domains $22 per year)
Email accounts x10-20 ($7.20 per mailbox on Google Business Starter) = from $72 to $144.
- For leads and sending campaigns with Snov.io
20,000 prospects + contacting 30,000 recipients = Pro 20K plan for $189.
Total = ~$450
Result after launching campaigns:
- Sending volume:
1000 emails daily = 50-100 emails* per email account.
*This is the safe per-account volume without risking the sender's reputation.
20,000 emails monthly (except weekends).
- Expected engagement: (with the right targeting and email copy)
(30% open rate) → 6,000 opens (5% reply rate) → 300 replies (20% positive)
60 booked meetings (75% show-up rate) → 45 sales demos (25% success rate) → 10 deals closed.
Your average purchase x10 = your revenue per month using this setup.
Follow these steps to get your outreach system ready. Let’s get started!
Step 1: Purchasing domains and creating email accounts
To figure out how many domains and email accounts you need, decide how many emails you plan to send or how many leads you want to contact.
Here’s a breakdown:
Each email account can safely send 50-100 emails per day. It's recommended to have 3-5 email accounts per domain.
Remember, a lower-end limit is the safer choice.
For example, to contact 100-200 leads per day, you’ll need 1 domain and 2 email accounts.
To send 1000 emails per day, you’ll need around 10-20 email accounts.
Adjust this formula for your daily sending goal.
| Daily sending goal | Number of domains | Number of email accounts |
| 100 emails | 1 | 2 |
| 500 emails | 2-3 | 10 (3-5 per domain) |
| 1000 emails | 5 | 20 (3-5 per domain) |
--> Purchase domains
Having separate domains (aliases) for sending cold campaigns is a smart strategy.
Purchase your domains from trusted, most popular providers, like GoDaddy Domains.
Go for .com, .org, or .io extensions and avoid domains like .online, .live.
This helps protect the reputation of your primary domain.
Make them resemble your brand name, like snov.outreach.com.
--> Add email accounts
The rule also applies to email accounts – stick with reputable providers.
For your targeted sales campaigns, we recommend Google Workspace or Microsoft for Business.
If you go for Google Workspace, here's your next step:
Visit the Google Workspace web page and follow the instructions to create your account.
Connect the domains you've bought earlier in the Google Workspace admin.
Then, for each domain, make 3-5 email accounts by adding new Workspace users.
Step 2: Technical domain setup
The way your domains are configured can impact email delivery for your email accounts. This is because a mailbox is always linked to a domain name.
--> Configure DNS records
There's no room for compromise here – you should configure DNS records for each of your sending domains.
These records include SPF, DKIM, DMARC, MX, A, and rDNS.
Why it matters:
Proper DNS records authenticate your emails and inform ESPs and recipient servers that you're a legitimate sender.
How to do it:
Domain records are entries in your domain's DNS settings. You can access these settings in your provider's account, where you purchased your domains.
For instance, if you bought domains from GoDaddy, you'll manage the settings in your GoDaddy account.
For help with setting up your domain records, follow the guides below.
Domain records setup checklist:
Before you proceed, make sure you know where to find your domain settings.
Where to find domain settings -->
Choose the DNS record that needs attention to open a setup guide.
--> Set domain forwarding
This is important if you've made alias domains for sending emails. Sometimes your recipients may want to check the email sender domain.
To make sure visitors from your alias domains reach your main website, set up forwarding in your alias domain settings.
How-to: Follow the provider's help documentation. Here's how you can do it with GoDaddy and NameCheap.
To check if it's working properly, visit the web address of your alias domain. You should be automatically redirected to your website.
Step 3: Connect email accounts to Snov.io
Snov.io uses your added email accounts and your email provider's servers to send emails.
How-to:
Connect your email accounts here → and give Snov.io permission to send emails from your email address.
The best part?
In Snov.io, you can connect an unlimited number of email accounts and use them as senders in your campaigns. This comes without any extra charges per account, unlike many competitors who charge per email address.
--> Set daily limits for your email accounts
To stay within the recommended maximum limit, you can set a daily sending limit for each email account.
How-to:
Go to your email account settings. Find a Messages per day parameter and set it to 50.
Remember: The recommended maximum is 50-100 emails per day, which includes warm-up emails.
When starting a campaign, begin below the maximum limit, and gradually increase it until you reach your desired number.
Avoid overloading your existing accounts with more than 100 emails per day to prevent burning them out.
To increase your sending capacity, buy more domains, set up additional mailboxes, and connect them to Snov.io.
Step 4: Check domain health
Do not skip this next action: perform a domain checkup to confirm that the configuration is correct.
How-to:
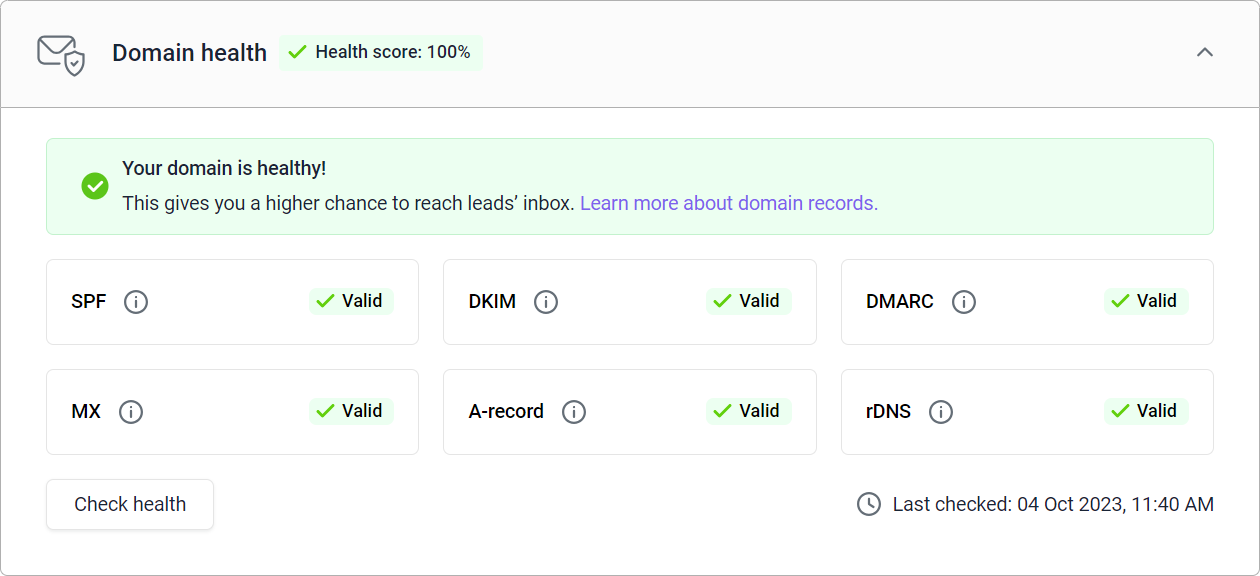
Use Snov.io's domain health checker for this task. This tool thoroughly tests all 6 records and identifies any potential issues.
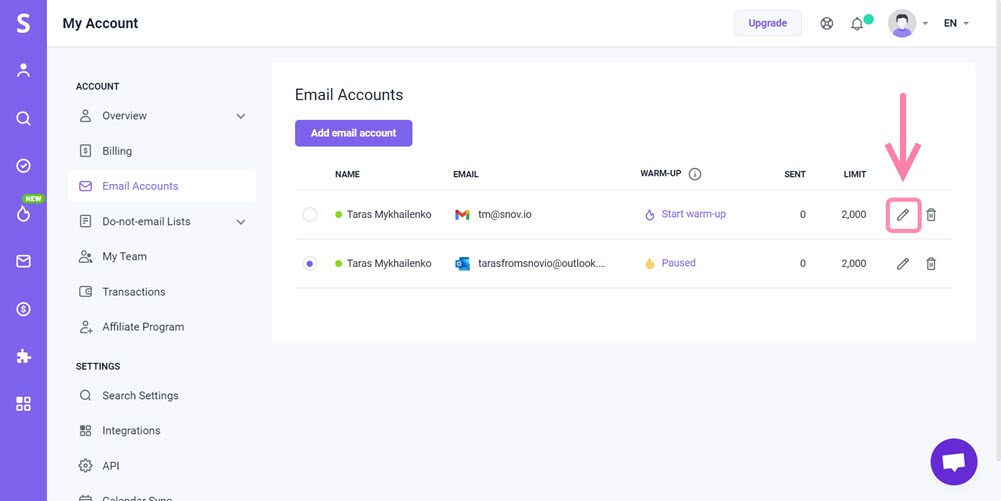
It's simple – Go to your email accounts list. Click on Edit next to the email account you wish to check.
Scroll down to the Optional settings section.
Select the Domain health tab and click on Check health. If the setup is correct, you'll see a valid status.
A domain health score above 85% is your green light to confidently launch your campaigns.
Remember to check all the other email accounts associated with your other domains.
Step 5: Add custom tracking domain
Now, you need to create your own custom tracking domain.
This unique domain (or sub-domain) will track email opens and link clicks specifically for you.
Why it's important:
A custom tracking domain can improve your deliverability by up to 20%.
Without it, Snov.io will rely on default domains shared by many other senders.
How-to:
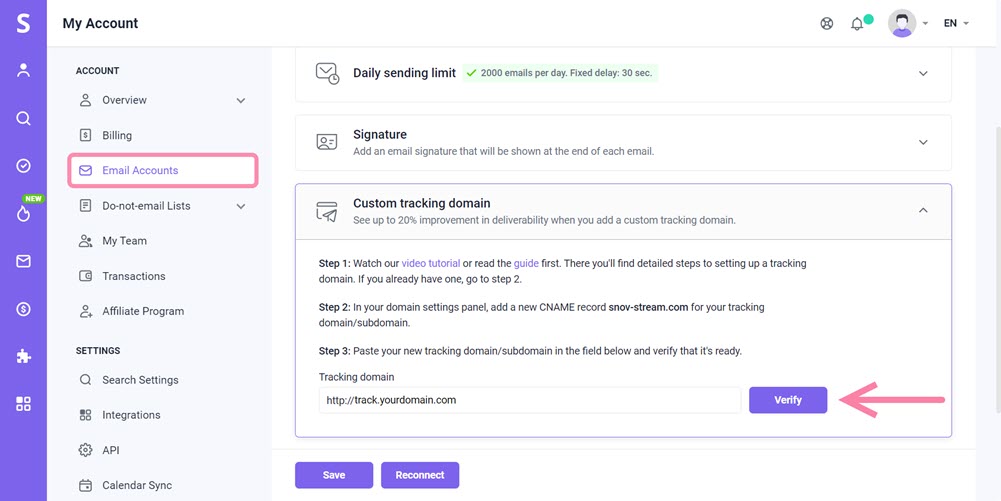
Create a new CNAME record snov-stream.com in the domain hosting settings: this record's name will be your tracking domain.
Once it's added to the DNS of your domain, add it to your email account settings in Snov.io.
Remember, all email accounts from the same domain can use the same custom tracking domain; just add it in the settings of each email account in Snov.io.
If you have email accounts on different domains, create CNAME records on every domain.
Read how to setup custom tracking domain →
Step 6: Warm-up email accounts
To build a strong sender reputation and ensure consistent high deliverability, your accounts must go through a warm-up period.
Don't skip this crucial step.
Always dedicate 2-3 weeks for an initial warm-up period before launching campaigns. It's a smart move for outreach success.
Here's a simple guideline:
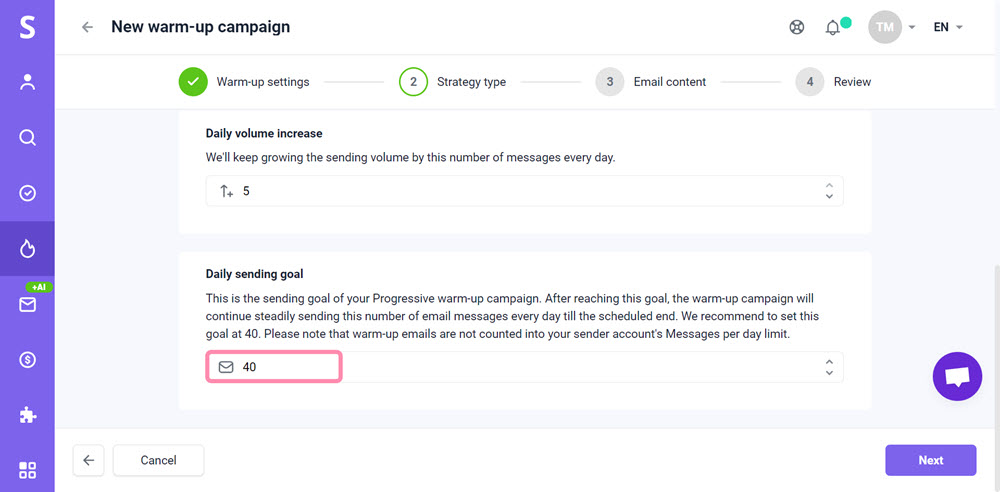
Let's say your goal is to send 100 emails per day in real outreach. To be safe, you should steadily work your way up to this volume using a progressive warm-up strategy.
How-to:
Snov.io automates your warm-up process and saves you time and money. You can focus on other tasks while your accounts are getting ready.
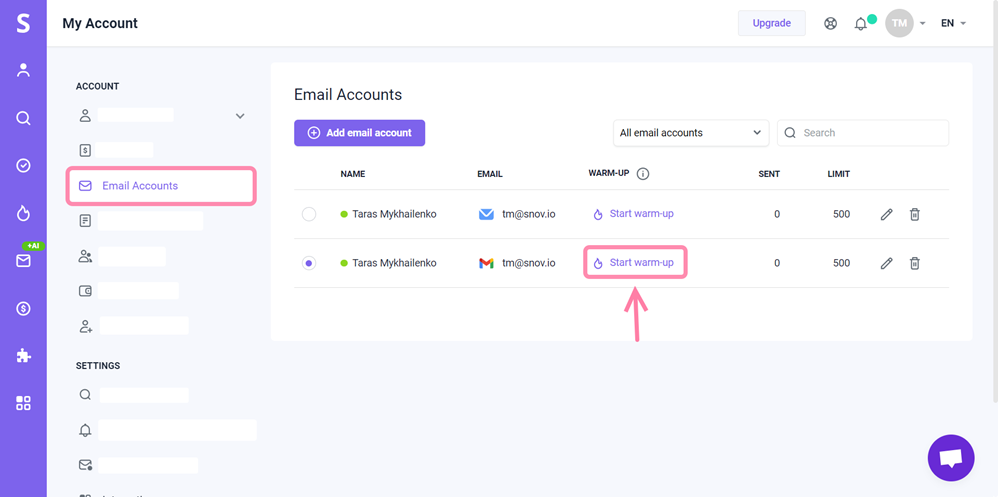
Go to your Email accounts list and click Start warm-up for all the connected accounts.
Good warm-up results require following recommendations and best practices.
Read tips and advice for best warm-up results →
What’s next:
To boost your sending capacity when the need arises, simply redo the steps from this guide.
Now, let's do a quick recap to make sure we've got every aspect of your setup completed!
- Purchased domains
- Set up mailboxes (email accounts)
- Configured DNS records on all domains
- Connected email accounts to Snov.io
- Checked your DNS records (domain health)
- Created a custom tracking domain and added it to Snov.io
- Started email warm-up
With your technical setup in order, wait for your accounts to complete the warm-up period as you work on other aspects of your outreach.
While your accounts are warming up, continue to:
Lead generation guide → Find targeted leads and build a list.
If you feel like this article doesn't address something you can’t figure out, email us at help@snov.io. Your feedback is very important to us!

Sorry about that 😢
How can we improve it?